Create a New EKS Cluster
In this procedure, you will create an Amazon EKS cluster directly from the Spot Console and an Ocean object to manage the cluster worker nodes.
Prerequisites
- Ensure you have an IAM user in your AWS account with both Console and Programmatic Access credentials. If you do not have one, you can follow this AWS procedure to create one or refer to your account administrator for the necessary permissions.
- Connect your AWS account to Spot.
- The Ocean Controller V2 installation is based on Helm, so make sure to have Helm installed on your machine.
- Install awscli 1.16.18+ and configure AWS credentials.
- Install kubectl (Amazon EKS-vended).
- Install aws-iam-authenticator (only for awscli versions below 1.16.156).
Get Started
-
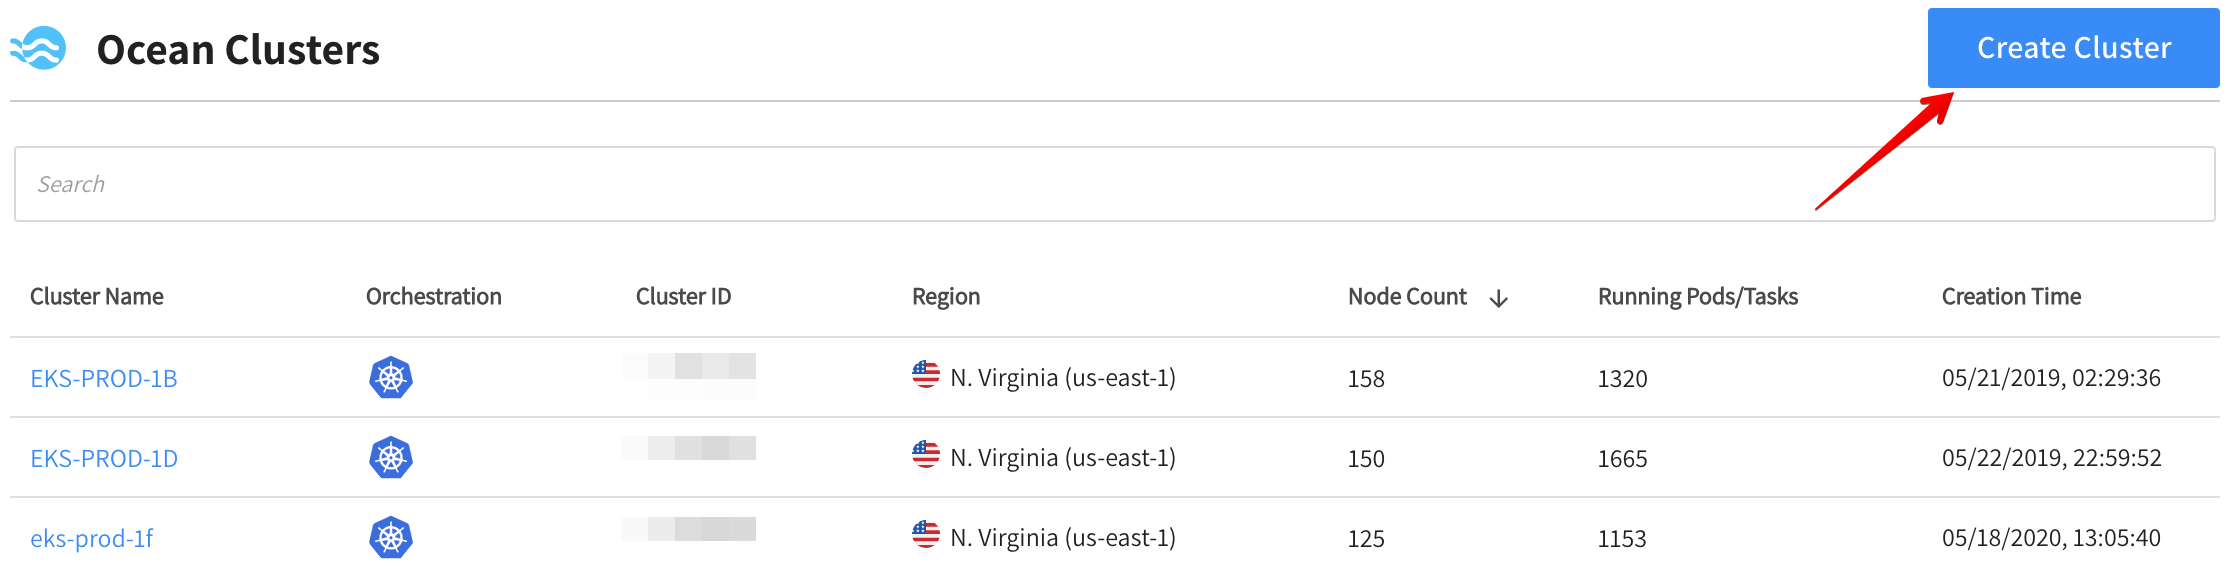
In the Spot Console's left menu, click Ocean/Cloud Clusters > Create Cluster.
-
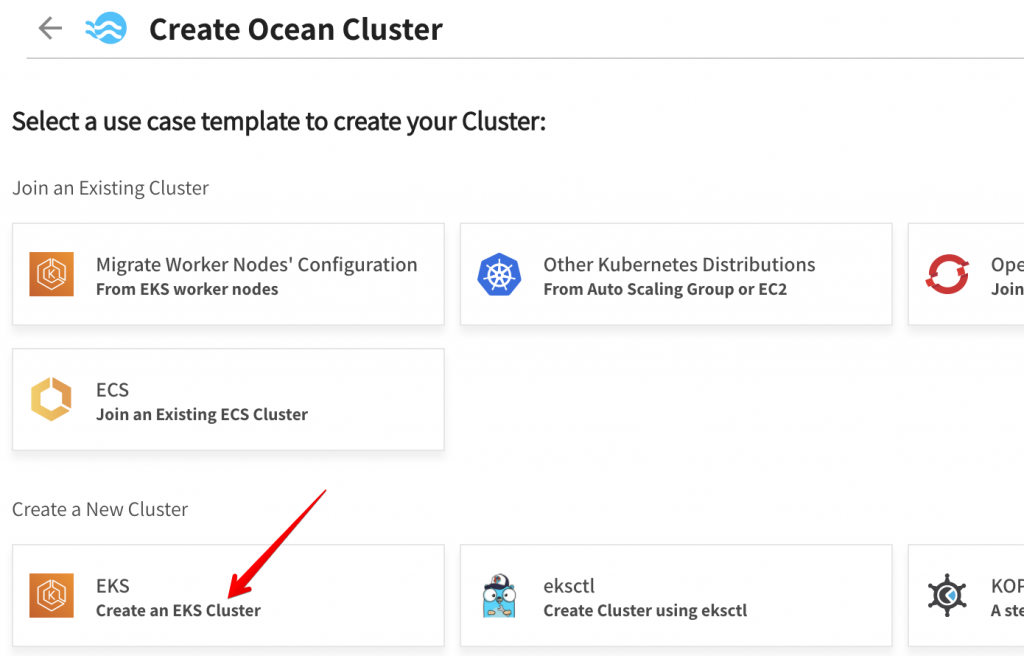
When the Create Ocean Cluster page appears, you must choose a use case template. Under Create a New Cluster, click Create an EKS Cluster.
Complete the steps described in the Create Cluster page. The steps are also described below.
Step 1: Create a Spot Token or Use an Existing One
Click Generate Token or use an existing Spot token. If you already have a token, you can paste it in the text box. The Spot token will be used later in the process to authenticate the Ocean Controller with Ocean SaaS, so be sure to save a copy in a safe place.

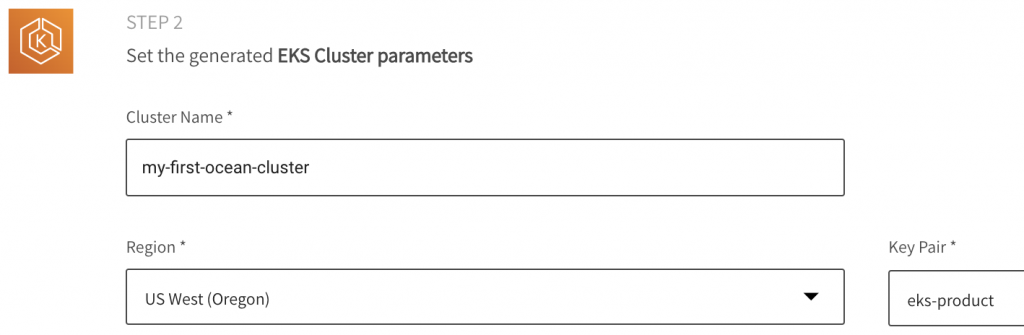
Step 2: Set the Generated EKS Cluster Parameters
Fill in general details including Cluster Name, Region, and the Key Pair used for the EC2 instances.
Step 3: Provision Resources
Provision the cluster resources using a CloudFormation template.
-
Use existing VPC & Subnets. Mark this box to launch CloudFormation with your existing VPC & Subnets. Leave unchecked to launch within a new VPC that CloudFormation will create for you.
-
Click Launch CloudFormation Stack.

-
To launch the stack mark the checkbox at the bottom confirming CloudFormation will create IAM resources, and click Create stack.

Before you can continue to the next step, CloudFormation must complete creation of all resources in the EKS stack. You can check the status on the CloudFormation page that opens.
Step 4: Install the Ocean Controller on the Newly Created EKS Cluster
- Connect your workstation to the EKS cluster by copying the command shown in Step 4 of the Create page and running it in your command-line interface. Note that the command must include the Ocean Cluster Name that you entered previously.
Click on the command to copy it.
-
To install the controller on the EKS cluster, run the predefined script from your command line.
-
(Optional) To install the Ocean Prometheus Exporter, mark the checkbox. Validate that the Configure Prometheus step is complete.
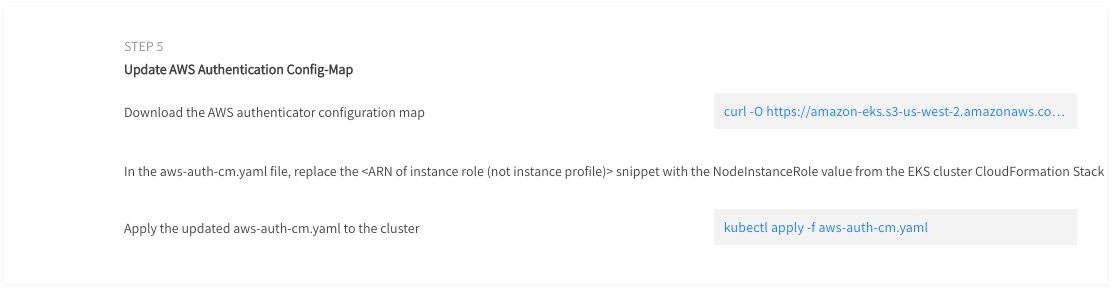
Step 5: Update AWS Authentication ConfigMap
- Download the AWS authenticator configuration map:
curl -O https://amazon-eks.s3-us-west-2.amazonaws.com/1.10.3/2018-06-05/aws-auth-cm.yaml - In the
aws-auth-cm.yamlfile, replace the<ARN of instance role (not instance profile)>snippet with theNodeInstanceRolevalue from the Outputs tab of EKS cluster CloudFormation Stack. - Apply the updated
aws-auth-cm.yamlto the cluster:kubectl apply -f aws-auth-cm.yaml
Do not modify any other lines in this file.
That's it! Ocean will now manage the worker nodes, optimizing cluster resource utilization and maximizing savings with Spot instances.
Troubleshooting
If you receive the error "aws-iam-authenticator": executable file not found in $PATH, then your kubectl is not configured for Amazon EKS. For more information, see Configure kubectl for Amazon EKS.
You can list your cluster nodes with the following command:
kubectl get nodes.
Related Topics
- Learn more about eksctl.